
Orbit 2 Outlet Hose Faucet Timer Manual: A Comprehensive Guide (Updated 03/26/2026)
Today’s date is 03/26/2026 at 16:50:10 ()․ This manual simplifies troubleshooting for your Orbit 2 Hose Advanced Faucet Timer, maximizing its potential․
Understanding the Orbit 2 Hose Faucet Timer
The Orbit 2 Hose Faucet Timer is designed for convenient and efficient outdoor watering․ Whether you’re maintaining a small garden or a larger landscape, this timer offers a straightforward solution to automate your irrigation․ Unlike complex in-ground sprinkler systems, the Orbit 2 provides a simple entry point into smart watering practices, even without pre-existing infrastructure․
This timer allows you to move beyond basic watering and establish a schedule tailored to your plants’ needs․ It’s particularly useful for those who don’t currently have a dedicated sprinkler system, offering a cost-effective alternative․ The guide focuses on maximizing the benefits of your new Orbit 2 Hose Advanced Faucet Timer, ensuring optimal performance and ease of use․
Key Features and Benefits
The Orbit 2 Hose Faucet Timer boasts several key features designed for user convenience and water conservation․ Its primary benefit lies in automated watering, eliminating the need for manual operation and ensuring consistent hydration for your plants․ This timer simplifies scheduling, allowing you to set specific watering durations and frequencies, optimizing water usage and promoting healthy growth․
Compared to relying on manual watering, the Orbit 2 offers significant time savings and reduces water waste․ It’s an ideal solution for busy individuals or those seeking to implement more sustainable gardening practices․ This guide will help you unlock the full potential of your timer, providing valuable insights into its functionalities and troubleshooting common issues․
Timer Models & Variations
The Orbit 2 series encompasses a range of hose faucet timers, each tailored to different watering needs and garden sizes․ While this manual focuses on the core functionalities applicable to most models, variations exist in features like the number of watering zones and advanced programming options․ Some models offer Bluetooth connectivity for smartphone control, enabling remote scheduling and monitoring․
Basic models provide straightforward on/off cycles and duration settings, suitable for simple watering tasks․ More advanced versions include multiple start times, rain delay functionality, and manual override capabilities․ Understanding your specific model is crucial for maximizing its potential․ Refer to the packaging or the timer’s display for model identification and specific feature details․
Initial Setup and Installation
Before programming, proper installation is key for optimal performance․ Ensure you have a standard outdoor hose faucet with consistent water pressure․ The Orbit 2 timer easily connects between the faucet and your garden hose․ Hand-tighten the timer securely to prevent leaks, but avoid using excessive force that could damage the threads․

Inspect the included rubber washer for proper seating within the timer’s connection point․ This washer is vital for creating a watertight seal․ Following connection, insert the required batteries (typically AA) into the designated compartment․ The timer should power on automatically, displaying the current time or prompting you to set it․
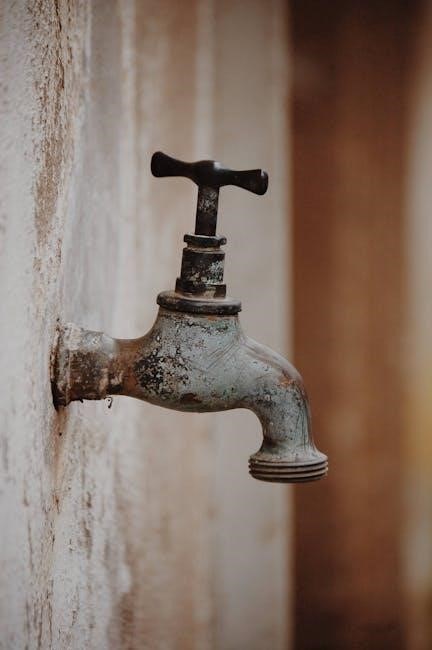
Connecting to the Faucet
Begin by ensuring your outdoor faucet is free of debris and operates without leaks․ Gently screw the Orbit 2 timer onto the faucet, clockwise, until hand-tight․ Do not use pipe tape, as it may interfere with the watertight seal․ Inspect the included rubber washer; ensure it’s correctly positioned inside the timer’s inlet connector before attaching it to the faucet․
Once connected, carefully check for any immediate leaks around the connection point․ If leaks are present, slightly tighten the timer further․ Avoid over-tightening, which could strip the threads․ Finally, attach your garden hose to the timer’s outlet, again hand-tightening to secure the connection․ A secure connection is crucial for efficient watering․
Battery Installation & Power-Up
The Orbit 2 timer typically requires two AA alkaline batteries (not included)․ Locate the battery compartment, usually on the side or back of the unit, and open it․ Insert the batteries, observing the correct polarity (+ and -) as indicated inside the compartment․ Ensure the batteries are firmly seated to establish a good connection․
After battery installation, the timer should automatically power on and display a welcome screen or prompt you to set the current time․ If the display remains blank, double-check the battery polarity and consider replacing the batteries with a fresh set․ Proper battery installation is essential for accurate timekeeping and schedule execution․

Programming Your Orbit 2 Timer
Successfully utilizing your Orbit 2 timer hinges on accurate programming․ Begin by navigating the timer’s menu using the control buttons – typically labeled ‘Set,’ ‘Menu,’ ‘Start,’ and directional arrows․ The interface is designed for intuitive operation, allowing you to customize watering schedules to suit your garden’s specific needs․
Before creating schedules, establishing the correct time and date is crucial․ This ensures watering occurs at the desired times․ The timer allows for flexible scheduling, accommodating various watering durations and frequencies․ Explore the menu options to discover the full range of programming capabilities, optimizing water usage and promoting healthy plant growth․
Setting the Current Time and Date
Accurate time and date settings are foundational for proper timer operation․ Access the ‘Time/Date’ setting within the main menu, usually by pressing the ‘Menu’ button repeatedly until it appears on the display․ Use the directional arrows to adjust the hour, minute, month, day, and year․ Confirm each selection by pressing ‘Set’ or ‘Enter’․
Pay close attention to the AM/PM indicator to ensure correct time input․ Some models may offer a 24-hour clock option․ Once the time and date are accurately set, the timer will reliably execute programmed watering schedules․ Regularly verify these settings, especially after power outages or battery changes, to maintain optimal performance․
Creating Watering Schedules
To establish a watering schedule, navigate to the ‘Program’ or ‘Schedule’ menu using the timer’s buttons․ Select a program number (if multiple are available)․ Define the start time for watering, utilizing the up/down arrows for hour and minute adjustments․ Next, specify the watering frequency – options typically include daily, specific days of the week, or interval settings (e․g․, every other day)․
Finally, set the watering duration, indicating how long the water will flow in minutes․ Review your settings carefully before saving․ You can create multiple schedules tailored to different zones or plant types․ Remember to activate the schedule for it to become operational․
Advanced Programming Options
Beyond basic scheduling, the Orbit 2 timer offers enhanced control․ Explore ‘Multiple Start Times’ to divide watering into segments throughout the day, beneficial for varying soil conditions or plant needs․ ‘Watering Duration Customization’ allows precise control, adjusting run times from one minute to several hours, optimizing water usage and plant health․
Some models feature seasonal adjustment, automatically modifying schedules based on the time of year․ Delve into the manual for specific model capabilities․ These advanced features empower users to create highly tailored watering plans, promoting efficient resource management and thriving landscapes․
Multiple Start Times
The Orbit 2 timer’s ‘Multiple Start Times’ function is a powerful tool for optimized irrigation․ Instead of a single, lengthy watering session, you can program several shorter cycles throughout the day․ This mimics natural rainfall patterns, improving water absorption and reducing runoff, particularly on sloped lawns․
This feature is ideal for gardens with diverse plant types, each requiring different watering frequencies․ Configure up to three independent start times, customizing the duration for each․ Consult your specific model’s manual for the exact number of available start times and programming instructions․ Efficient watering is now within reach!

Watering Duration Customization
Orbit 2 timers offer granular control over watering duration, crucial for plant health and water conservation․ You aren’t limited to preset intervals; adjust watering times from as little as one minute up to several hours, depending on your model․ This flexibility caters to varying plant needs – succulents require less water than thirsty flowerbeds․
Consider soil type when customizing duration․ Sandy soils drain quickly, needing shorter, more frequent cycles․ Clay soils retain moisture, benefiting from longer, less frequent watering․ Experiment to find the optimal settings for your garden․ Remember, precise duration control minimizes waste and promotes thriving landscapes!
Rain Delay Functionality
The Orbit 2 timer’s rain delay feature is a valuable asset for responsible water management․ When inclement weather arrives, activate this function to temporarily suspend your programmed watering schedule․ This prevents overwatering and conserves precious resources, avoiding soggy gardens and wasted water bills․
Typically, you can set the rain delay for a specific duration – from 24 hours up to several days – depending on the forecast․ The timer will automatically resume your regular schedule once the delay period expires․ Utilizing this feature demonstrates eco-consciousness and ensures your garden receives water only when it truly needs it, promoting healthy growth․
Manual Watering Override

Sometimes, despite a carefully programmed schedule, your garden might require immediate attention․ The Orbit 2 timer offers a convenient manual watering override function for these situations․ This allows you to initiate watering instantly, bypassing the pre-set schedule for a specified duration․
Activating the override is usually a simple process, often involving a dedicated button or a combination of button presses․ You can then select the desired watering length․ This feature is particularly useful for spot-watering newly planted areas or addressing unexpected dryness․ Remember to deactivate the override once finished, allowing the timer to resume its automated schedule, ensuring consistent and efficient watering․
Troubleshooting Common Issues
Encountering problems with your Orbit 2 timer is often easily resolved․ This guide provides insights into common issues and their solutions․ A frequent concern is the timer displaying an incorrect time․ Ensure the battery is fresh and the time/date were set correctly following the initial setup instructions․ Another common issue is a lack of water flow despite a programmed schedule․
Check for kinks in the hose, ensure the faucet is fully open, and verify the timer’s filter isn’t clogged․ This manual aims to simplify troubleshooting, helping you quickly restore optimal performance and maintain a healthy, well-watered garden․ Don’t hesitate to consult the FAQ section for further assistance․
Timer Not Displaying Correct Time
If your Orbit 2 timer shows an inaccurate time, the first step is to verify the battery’s condition․ A low battery can cause timekeeping errors or complete display failure․ Replace the battery with a fresh one, ensuring correct polarity․ Next, revisit the “Setting the Current Time and Date” section of this manual․ Carefully follow the programming steps to re-enter the correct time and date․

Confirm that the AM/PM setting is accurate․ If the problem persists after these steps, try resetting the timer to its factory defaults (refer to the manual for reset instructions) and then reprogram it․ Consistent time accuracy is crucial for reliable watering schedules․

No Water Flow Despite Programming

Experiencing no water flow despite a programmed schedule? First, ensure the faucet is fully open․ A partially closed faucet restricts water pressure․ Next, check for kinks or obstructions in the hose connected to the timer․ Inspect the timer’s filter screen for debris; a clogged filter significantly reduces water flow․ Remove and clean the filter thoroughly․
Verify the programmed start time has passed and the watering duration hasn’t expired․ Manually override the timer (see “Manual Watering Override” section) to test if the system functions correctly․ If still no flow, inspect the backflow preventer for blockage․ A malfunctioning backflow preventer will halt water delivery․
Winterization and Storage
Protect your Orbit 2 timer from freezing temperatures to prevent damage․ Before the first frost, disconnect the timer from the faucet and hose․ Thoroughly drain all water from the timer body and hose․ Remove the batteries to prevent corrosion and potential leakage during storage․ Store the timer in a dry, sheltered location, ideally indoors, away from direct sunlight and extreme temperatures․
Avoid storing the timer in a shed or garage that isn’t adequately insulated․ Prolonged exposure to freezing conditions can crack the timer’s housing and damage internal components․ Proper winterization ensures your timer is ready for use next spring, extending its lifespan and performance․
Replacing the Battery
Maintaining proper battery power is crucial for accurate timer operation․ When the display appears dim or erratic, or the timer fails to hold programmed settings, it’s time for a battery replacement․ The Orbit 2 timer typically requires two AAA alkaline batteries․ Locate the battery compartment, usually on the back or side of the unit, and open it according to the manual’s instructions․
Remove the old batteries and insert new ones, ensuring correct polarity (+ and -)․ Close the battery compartment securely․ After replacing the batteries, you may need to reset the time and date․ Always use high-quality alkaline batteries for optimal performance and longevity․
Frequently Asked Questions (FAQ)
Q: My timer display is flashing․ What does this mean? A: A flashing display usually indicates low battery power or a programming error․ Replace the batteries and re-check your schedule․ Q: Can I use this timer with a rain sensor? A: Yes, the Orbit 2 timer is compatible with most standard rain sensors, providing automatic water conservation․ Q: How do I reset the timer to factory settings? A: Consult your specific model’s manual for reset instructions, as they vary․
Q: The timer isn’t watering at the scheduled time․ A: Verify the current time, date, and watering schedule are correctly programmed․ Ensure the manual override isn’t activated․
Where to Find Additional Support & Resources
Orbit’s Official Website: Visit Orbitonline․com for a comprehensive knowledge base, downloadable manuals in PDF format, and troubleshooting guides specific to your Orbit 2 timer model․ YouTube Tutorials: Search “Orbit 2 Timer Setup” on YouTube for numerous video tutorials demonstrating installation, programming, and common fixes․
Customer Support Hotline: Contact Orbit’s dedicated customer support team at 1-800-ORBIT-HELP (1-800-672-4843) for personalized assistance․ Online Forums & Communities: Explore online gardening and home improvement forums for shared experiences and solutions from other Orbit 2 timer users․
Warranty Information
Orbit Products Warranty: Your Orbit 2 Outlet Hose Faucet Timer is protected by a one-year limited warranty against defects in materials and workmanship from the date of purchase․ This warranty covers product replacement or repair, at Orbit’s discretion․

Warranty Exclusions: Damage resulting from improper installation, misuse, abuse, unauthorized modifications, or acts of nature are not covered․ Proof of purchase (receipt) is required for all warranty claims․ To initiate a warranty claim, contact Orbit Customer Support at 1-800-ORBIT-HELP or visit Orbitonline․com/warranty․